DIY Hardware Password Keeper
Contributors
Objective
The goal of this project is to create an advanced encryption storage device that is easy to use and build. This device will allow users to store an unlimited number of passwords which can be accessed using an RFID key fob.
The project consists of
- hardware
- the device itself

- RFID key
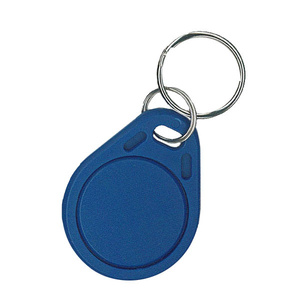
- the device itself
- software
- firmware
- services
- util
- web interface
- firmware
Hardware
Hardware part is built on Raspberry Pi Zero (W - optional).
Bill of material
- Raspberry Pi Zero (W - optional)
- OLED Display - 0.96” I2C IIC SPI Serial 128X64 OLED LCD Display SSD1306 for 51 STM32 Arduino
- MFRC-522 RC522 RFID Radiofrequency IC Card Inducing Sensor Reader for Arduino M5
- Momentary Panel PCB Tactile Tact Push Button Switch 4Pin 6x6x4.5mm TS
- 3mm LED Light White Yellow Red Green Assortment Kit for Arduino
- 0.8mm 63/37 Tin Lead Rosin Core Solder Flux Soldering Welding Iron Wire Reel 14m
- AWG30 wrapping wire
- 4 x M2x12 bolts/nuts
- Soldering iron
Wiring schema
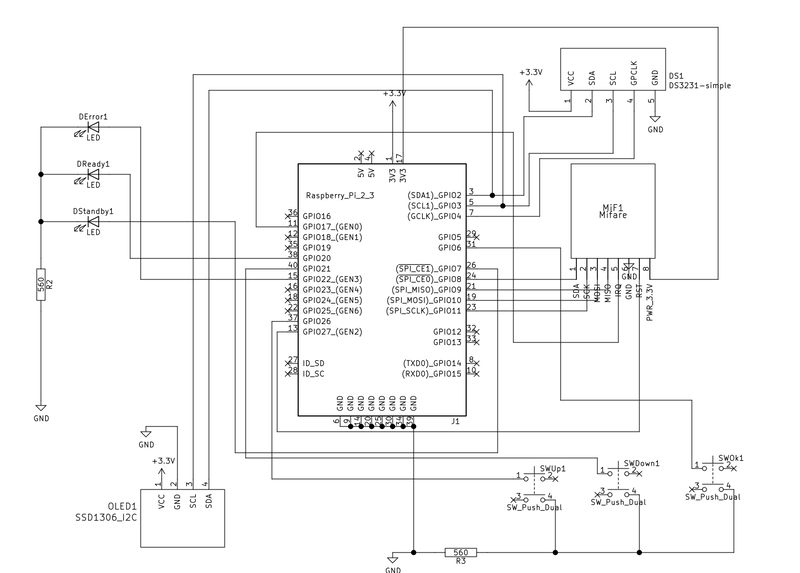
The wiring is pretty simple, just make sure you have at least 2 inches ( 5 cm ) of wire between components, so you won’t have hard time trying to fit them into the case.
Case
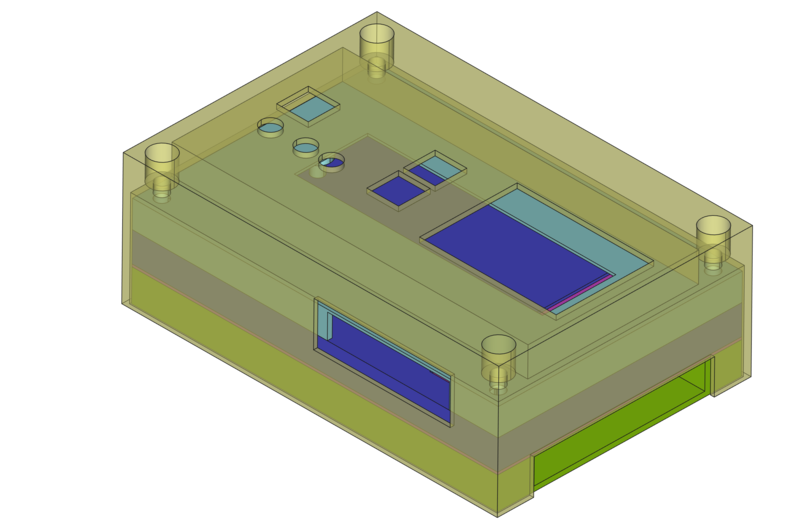
The case can be 3D printed using any PLA filament. The .STL models are provided in the /case/stl/ folder. Using a layer height of 0.15 mm should work, you can try 0.20 for a quick print or go thinner for smoother surfaces.
Firmware
The OS is based on Linux Kernel 4.14 for Raspberry Pi.
The application is written in Golang with heavy use of https://periph.io/ components for MFRC522 and OLED display.
Building
Requirements
Instructions
The application consists of 2 components:
- firmware
- service
- oled splash
- web interface ( AngularJS )
These components can be built separately:
make web- builds the web interface. The application embeds the WEB interface into itself, hencemake webhas to be invoked first, in order to produce all necessary artifacts.make firmware- builds servicesmake all- builds the web interface and servicesmake linux- builds the linux image to write on a micro SD card for Raspberry Pi. Requires path to buildrood to be set inBUILDROOTvariable.
make all linux BUILDROOT=%PATH/TO/BUILDROOT/HERE%
will build the web interface, services and will invoke buildroot to produce the disk image in buildroot/images/sdcard.img file. This file can be written onto a micro SD card with
dd if=buildroot/images/sdcard.img of=/dev/sda bs=1M
Usage
Once the device is assembled, you will need to plug it into the USB port of your computer/laptop.
When you see the prompt on OLED display ( yellow LED will be lit )- insert the FOB into the device to unlock the encrypted internal storage.
Make sure that you use proper data cable - not just charging cable!. The cable has to be inserted into the data port on the device itself, otherwise the device won’t be able to communicate with the computer properly.
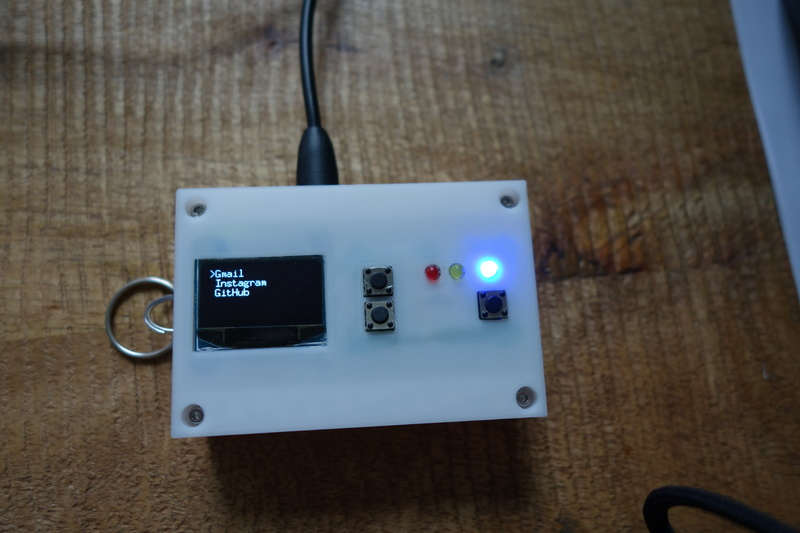
The device will register itself as a network interface in the computer/laptop and will be accessible at http://10.101.1.1
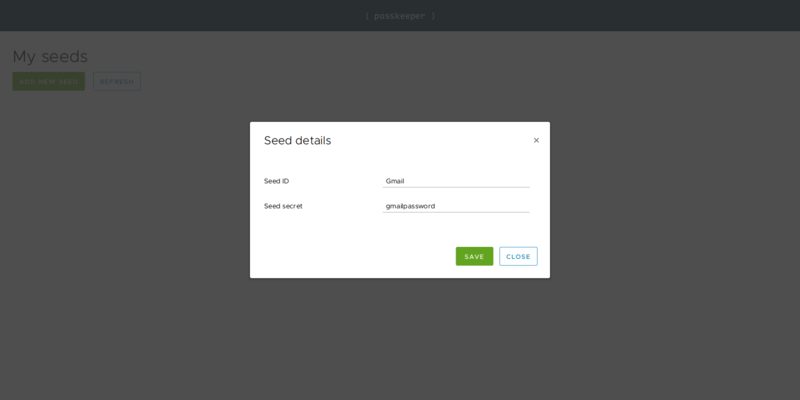
Add/update password
Initially there will be no passwords ( for some reason we called them seeds ) configure, so you will be able to add your own:
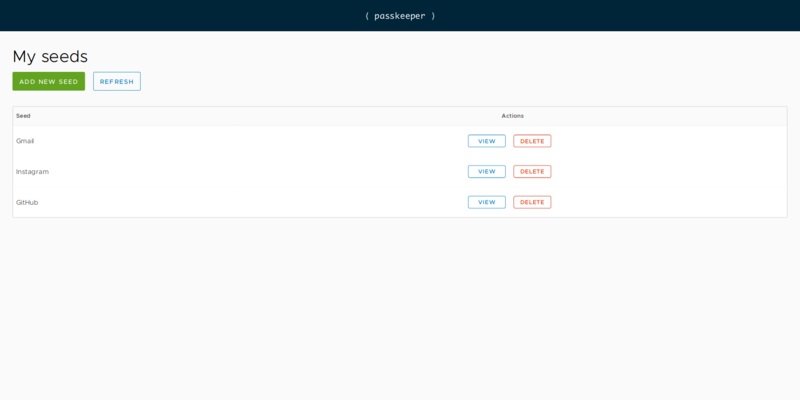
View passwords / dashboard
The dashboard shows the list of the passwords stored in the device:
Roadmap
Software / UI
- Add backup/restore options for the password storage
- Add password generation
- Add more keys to the same device that will unlock partial storage, so it will be possible to share the device between users.
Hardware
- Improve the design of the case, make it more ergonomic.
- Design PCB for easy assembling.
Contact
Please feel free to contact us if you’d get any questions or comments.
Project updates
If you want to keep in touch and get some news / updates / new feature announcements - please subscribe here. We are not going to share your e-mail address anywhere with anyone